I contacted Cilogear and ordered a hipbelt Apr-17-2023. I spoke to them Jun-20-2023 and I was told it would ship that week. I spoke to them Jul-25-2023 and was told it would ship that day. I spoke to them around Aug-03-2023 and was told it should arrive Aug-04-2023. It never arrived. I sent them some emails and called them several times. No emails were answered and they never answered their phone again. I have seem a few posts on Facebook from Cilogear. I don't know if the company is still in business. I don't know if you order gear that it will ever arrive. I think they make great gear, but you need a company to stand behind their gear.
As a point in contrast, I bought a very high quality sleeping bag on ebay that was made in 1995. It had an issue and needed to be repaired. Even though the company had moved twice since 1995, they still existed. They answered my email within a day or so. I shipped them the broken part, and in a few weeks I had the repaired/replaced part back.
I bought a used CiloGear V2 60 WorkSack, size medium. This is a 60 liter pack which is designed for alpine climbing, which is somewhat different from a general purpose pack. It is designed to carry two ice tools (ice axes) as well as a pair of crampons. That isn't very unusual, as many packs have the same features. The way the ice tools and crampons are attached are of a superior design to other packs. The pack is generally of a streamlined design, with little sticking out. That is pretty important for a climbing pack, but not so important for general use. It's construction is a bit more complex than any other pack that I am familiar with, and it is made with more different materials than any pack that I am familiar with. It is more modular and configurable than any other pack that I know of. The quality of workmanship is first rate, and overall it is the best designed pack that I have ever seen. I will be comparing this pack with the WildThings Icesac which is another pack designed for alpine climbing.
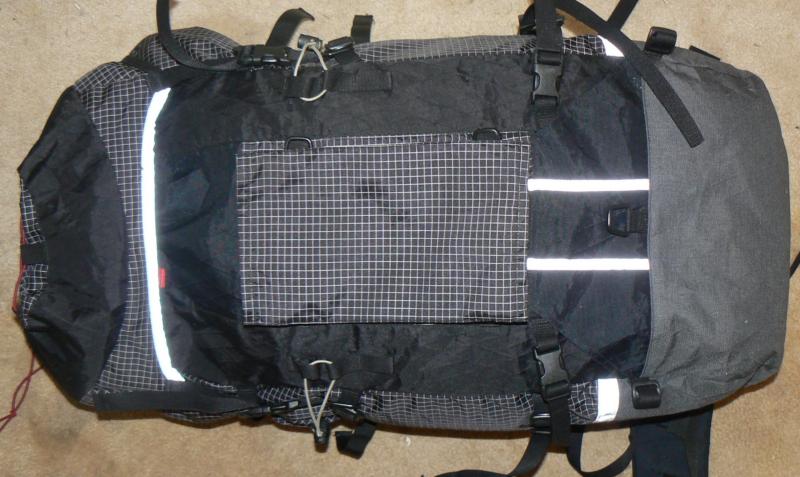
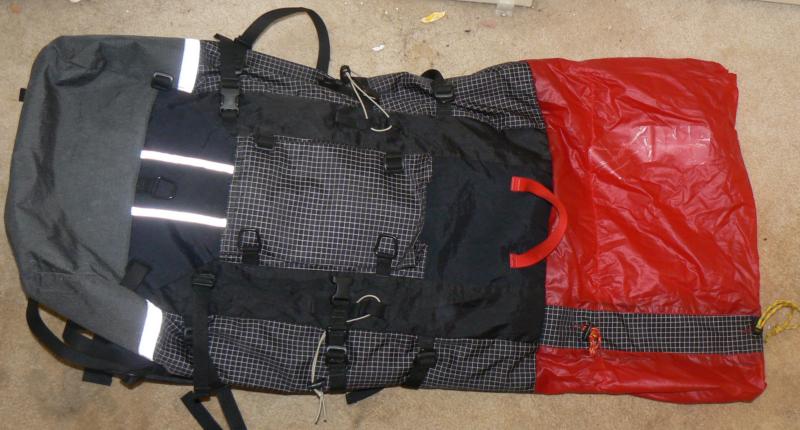
This is a view of the back of the pack. Many features of the pack are visible. The black rectangular area in the center is a pocket for holding crampons. The two black triangle shaped pieces of material (which are hard to make out, but between the crampon pocket and pack bottom), whose inside edge has reflective strips are where the heads of the ice tools go. The ice tool heads are secured with the side release buckles next to the black triangular material. The shaft of the ice tools are secured with the gray cords that are higher up on the pack. The doubled cord is wrapped around the shaft, and then the cord is looped over the cord toggle. Then the cord toggle is tightened to secure the cord loop. The cord is 1/8 inch elastic, which replaces the Sterling Glo-Cord found on the v3 pack. Either is strong enough, but the elastic will eventually wear out
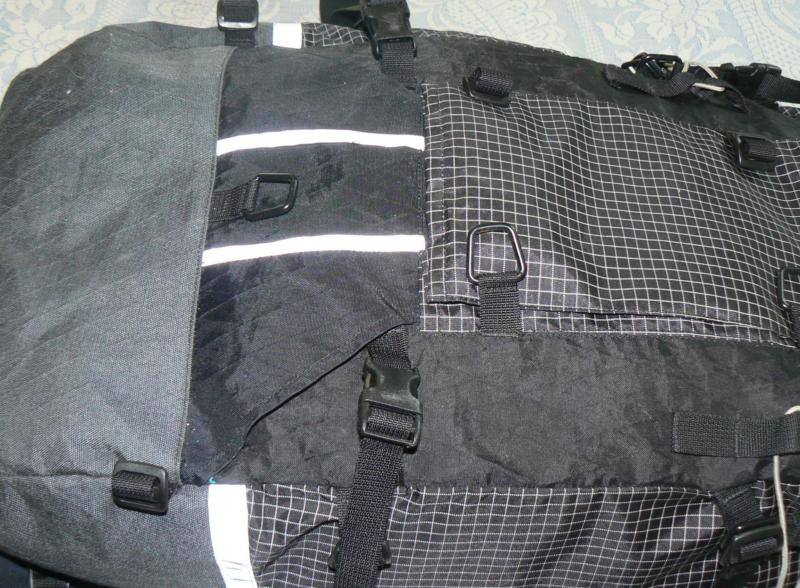
This is a close up of the tool holders on the pack. There is a flap of material sewn to the pack at both ends that secures the head of the tool. It is black with a diamond pattern on it. The shaft near the head is secured with the black side release buckle. The inside of the flap of material is edged with reflective material to make it easy to see in low light conditions. Also visible is the crampon holder, made of black Dyneema / Cordura ripstop fabric (which used to be called spectrum) with a blue bottom. Visible on the side of the crampon holder is a 'Dee-clip' which is what makes the pack so configurable. The central lower dee-clip is also found on the v3 pack, but not the v4 pack. It is used for the optional shovel pocket.
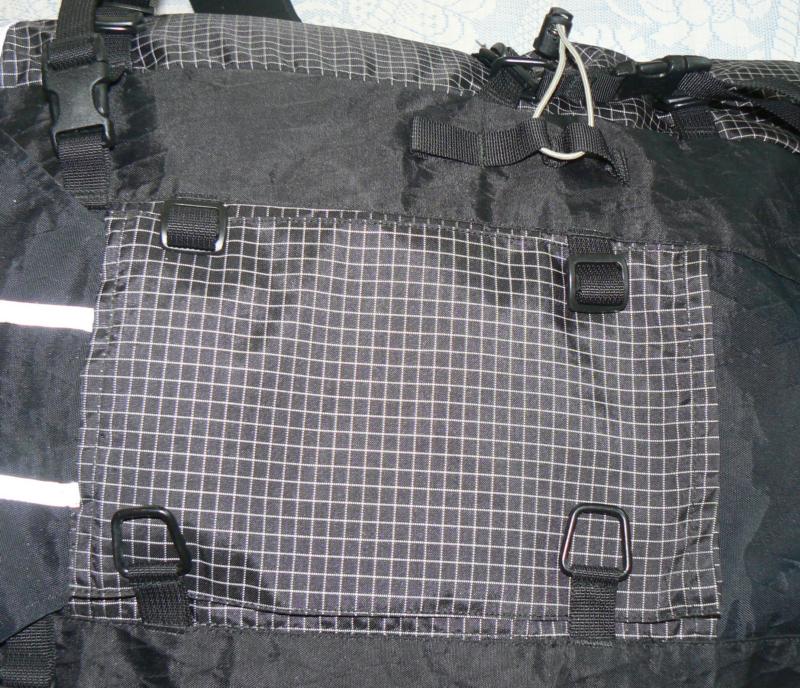
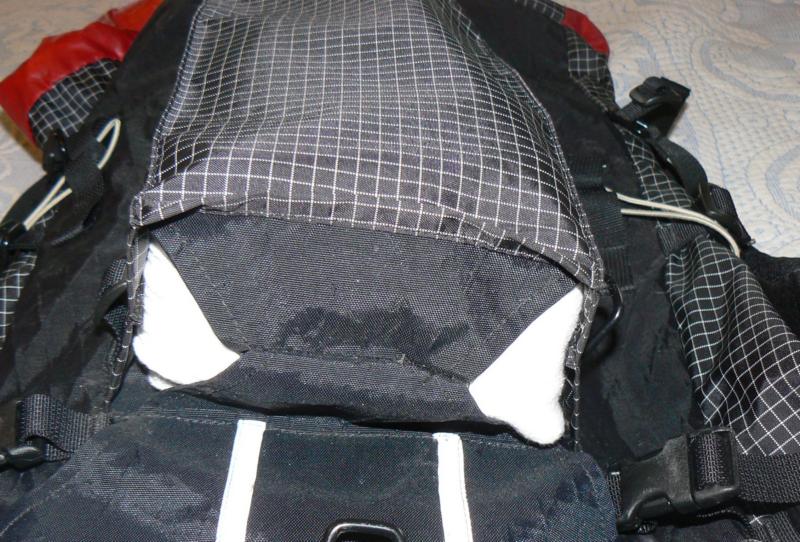
This is the crampon holder. Crampons have many sharp points, and when used get lots snow on them. The snow melts, which makes the crampons wet. It is a good idea to keep the crampons outside the pack so they don't get stuff inside the pack wet, and so the sharp points don't poke holes in anything. The second picture shows the bottom of the crampon holder. I stuffed in a white shirt, to fill the holder, and make the drainage holes on the bottom sides more visible. When the crampon holder is not in use, it folds flat against the pack. Of course, you can put whatever you want in the crampon holder, if you aren't using crampons. There are two pairs of attachment points on the sides of the crampon holder so two straps can be used to secure whatever is inside. There should be 1/8 inch elastic cord laced over the crampon holder to keep it flat when not in use, and to help secure the crampons when inside. You could also use it to strap things outside the pack. I will definitely add this to my pack.
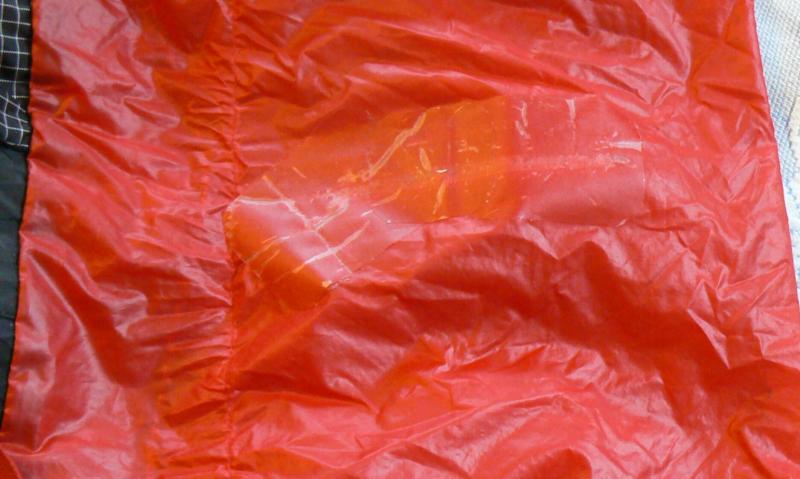
This picture shows the red pack skirt extension. It is made of two layers of sil-nylon, which is a very lightweight, abrasion resistant nylon coated with silicone. It is a lighter material than the v4 pack's skirt. If you look closely at the second picture, you can see where mine got ripped and I repaired it with clear McNett Tenacious Tape. Very little will stick to sil-nylon. Since it is usually inside the pack, it doesn't need to be as robust as the normal exterior of the pack. You can see there are two draw-cords, one near the bottom of the skirt, which is the one that is usually used. They look to be 4mm cord. When the skirt is used, the drawcord on the top of the skirt is used. Also visible in this picture is the red haul strap on the back of the pack.
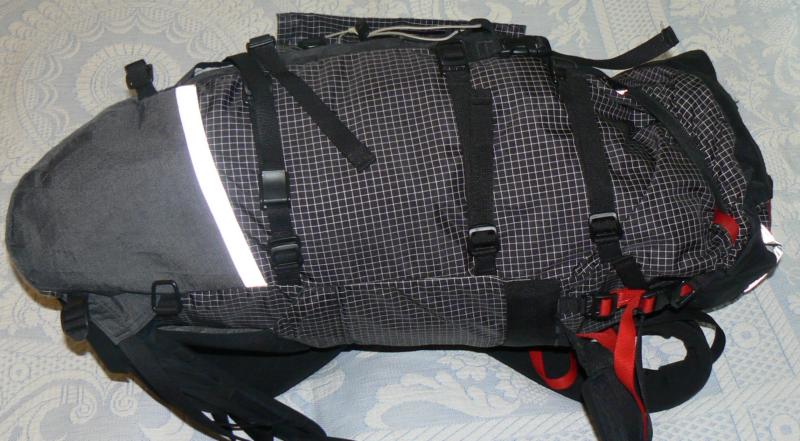
This is the side of the pack. The lid of the pack is on. Working down from the lid, are three compression straps. The bottom strap is the 'oral' strap which doesn't ship with packs anymore. It is a bit complex, but the purpose of it is to allow a ski pole or similar item to be stored on the outside of the pack, and released without loosening the strap. These straps are removable. You could add a forth compression strap below the lowest black strap. You can arrange the straps at a diagonal. Included with the pack, but not shown are another pair of red straps, and a pair of short black straps. The owners manual describes some of the many possible options for using the straps. Near the bottom of the pack is a stripe of reflective material. Below that, is the bottom of the pack which is made of a heavier material, as much wear occurs near the bottom of the pack. This material is Dimension Polyant VX51 which is 500x1000d Cordura nylon on the outside, and has a total of 5 plies of material. It is quite robust.

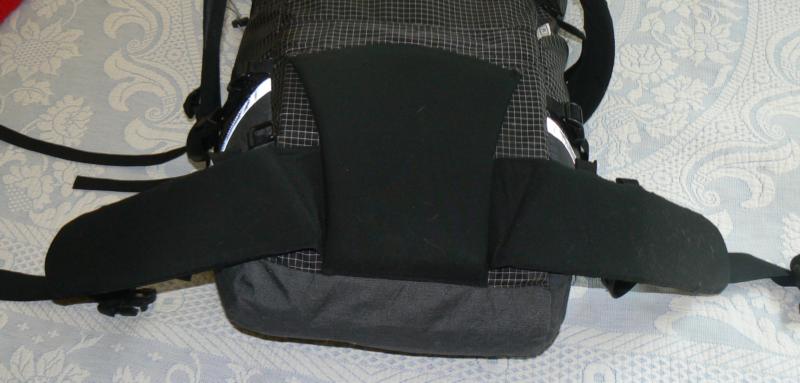
This is the front of the pack, i.e. the part which rests against your back. The lid is on the pack, and there is a reflective stripe of material next to the external lid zipper. The lid attaches to the pack with two adjustable red straps. The v2, v3 and v5 packs have a central dee-clip in the center, which the v2 pack doesn't have. This is a much more elegant way to attach the lid than the WildThings Icesac's lid. Next to the lid, is a red haul strap. Below that, is a piece of 2 inch wide black webbing. This is where the top of the shoulder straps attach to. The tops of the shoulder straps consist of two layers of 2 inch black webbing which is bartacked to the black material of the shoulder strap as well to the 2 inch wide black webbing on the pack. This makes a very strong flexible mounting point for the shoulder straps. Not visible, is the bottom of the shoulder straps which attach to a double thickness triangle of material which is the same material as the bottom of the pack. The shoulder straps have load transfer straps which attach to the top of the frame of the pack, and their attachment point on the shoulder strap is adjustable with the black slider visible on the shoulder straps. The sternum strap present on the v3 and v4 packs is missing. I plan on adding one. The shoulder straps are made with two layers of foam inside, and the outer layer is quite rigid compared to other shoulder straps I am familiar with.
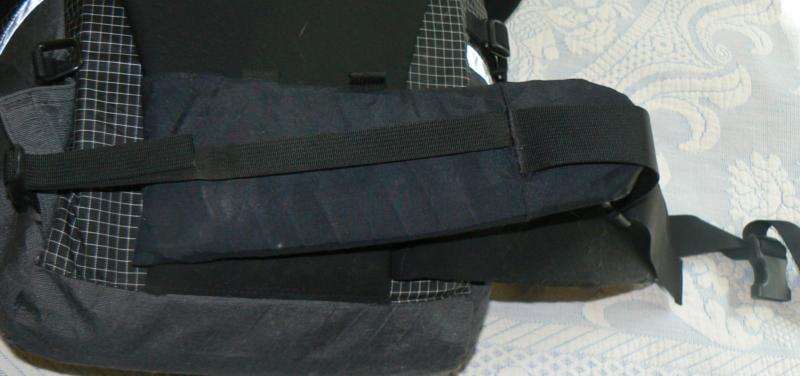
This is the hip belt. It is pretty similar in construction to the shoulder straps. It uses two layers of foam, and they seem to be very similar to the foam used in the shoulder straps. The belt is a single piece, with some velcro in the center. On the bottom of the pack is a black, padded sacrum pad with a slot in it, and some velcro which mates with the hip belt velcro. The pack frame height is adjustable by three inches, based on how the hipbelt is attached. This is very similar to the way the Kelty cloud packs adjust. The close up of the belt shows the outside of the belt in black. There are two attachment points for cord on the top of the hip belt, likely for gear loops (used to hold climbing gear while climbing). It is slightly different than the v3 and v3 belt. The hip belt attaches in the front using 1.5 inch webbing and a standard side release plastic buckle. The 3/4 inch black webbing visible on the belt attaches to the sides of the frame and is used to pull the pack in close to your body.
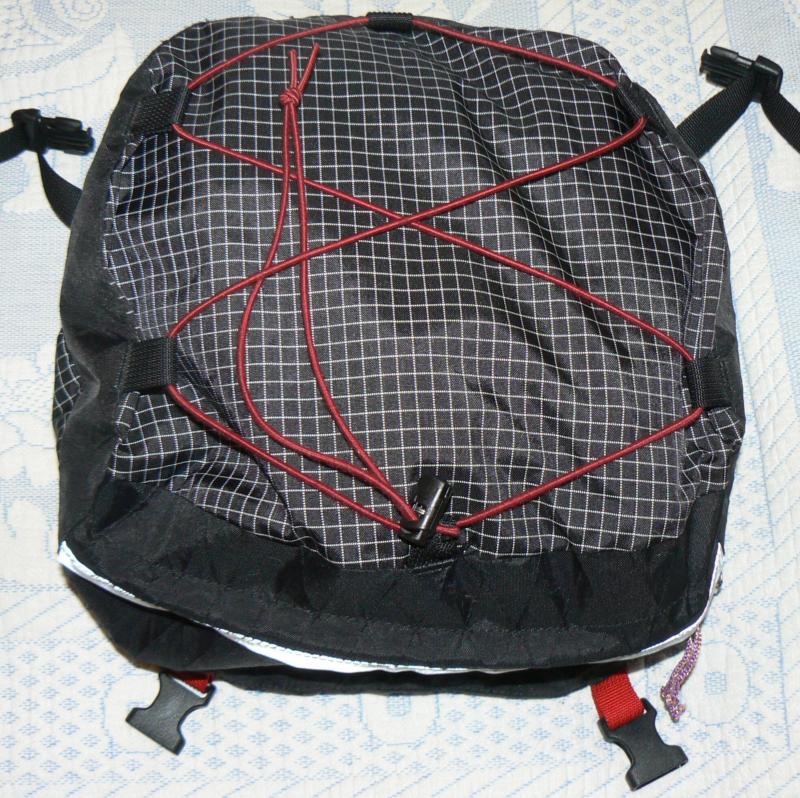
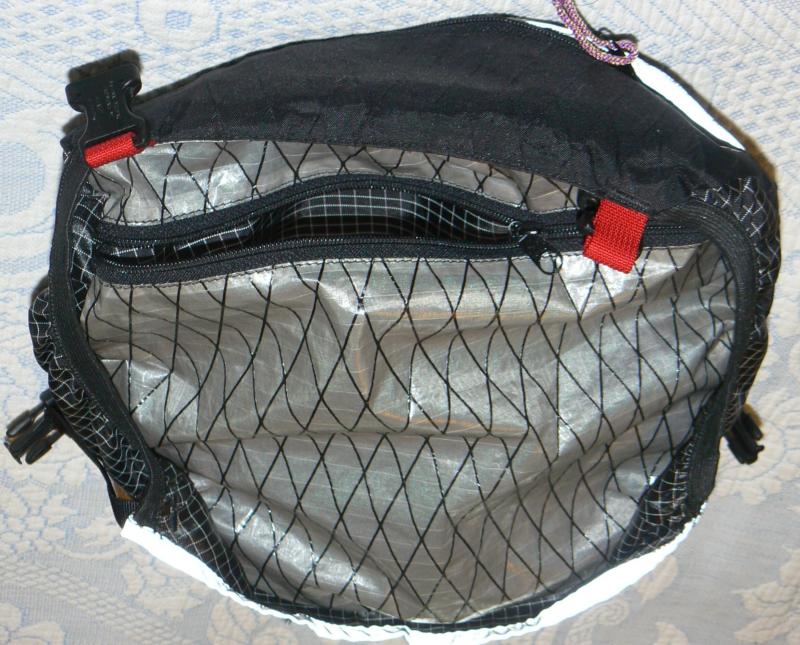
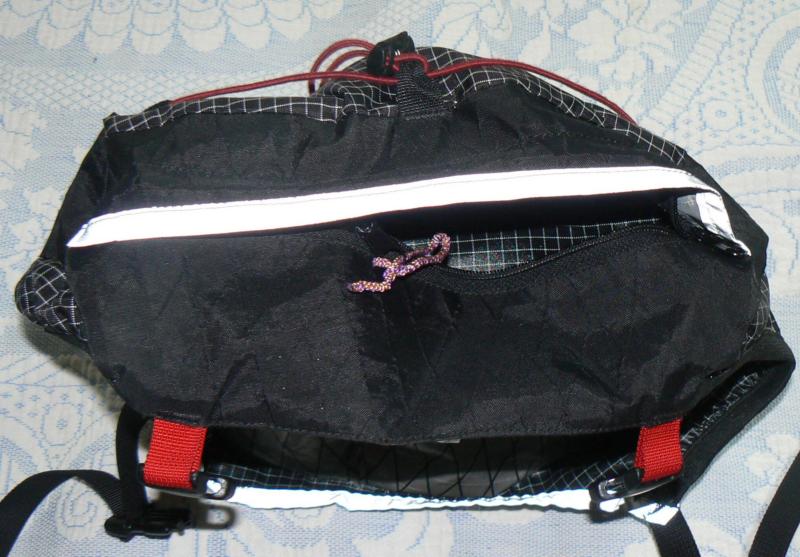
This is the pack lid. The top is made out of black spectrum fabric. There are six lash points around the perimeter of the lid. There is 1/8 inch elastic cord attached. I believe these are designed to secure a climbing helmet, but could be used for other things. On the bottom of the lid is a separate compartment from the main lid compartment, with the zipper half open in the picture. The last picture shows the side view, which shows the reflective material next to the main compartment zipper. It features twp zipper pulls, but has a flap over the zipper, unlike the v3 and v4 packs which have no flap but a urethane coating on the zipper fabric and teeth for water proofing. You can see the two red straps which are used to attach the lid to the pack. Since the main pack has a drawstring, the lid isn't really needed, and can be left off if desired.
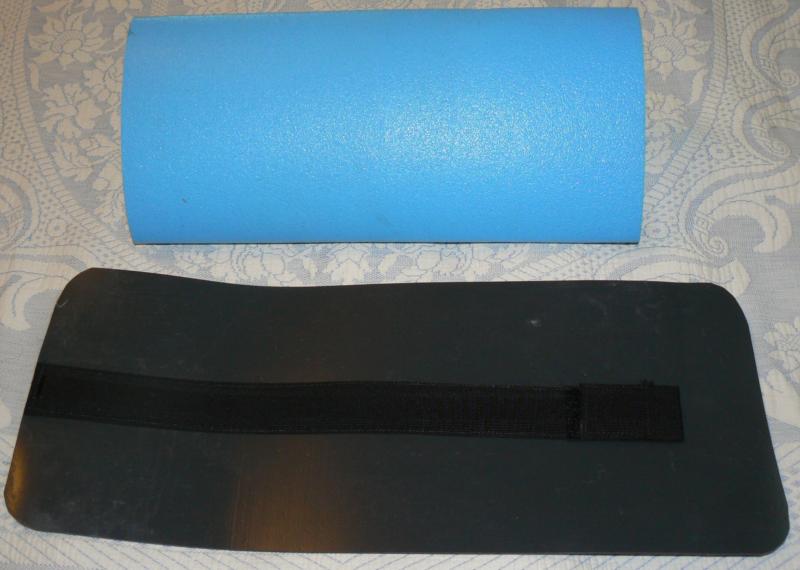
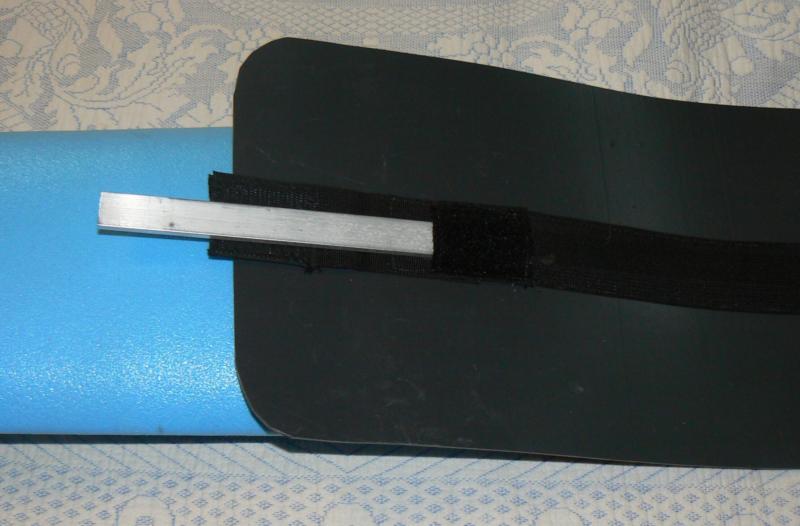
Unlike the WildThings Icesac, the CiloGear pack has a frame. The frame consists of a piece of thin, quite dense foam (10 lb per cf) folded in thirds (its blue). Next to the foam is a thin framesheet (its black) made of HDPE. In the center of the framesheet is black material which contains a pocket for an 6061 aluminum framestay. The top of the pocket is secured with velcro. The aluminum is thicker than the stay used in my 40v3 and 40v4 packs, which makes sense as a bigger pack will be carrying heavier loads.
There are some people who think frames aren't necessary. Perhaps for actually doing technical climbing, or for really light loads under 20 lbs. For all other occasions, I really like having a frame to transfer the weight. This frame isn't as robust as my McHale's frame (which is a 80 liter pack), but it is the most robust frame I have seen in a 60 liter pack.
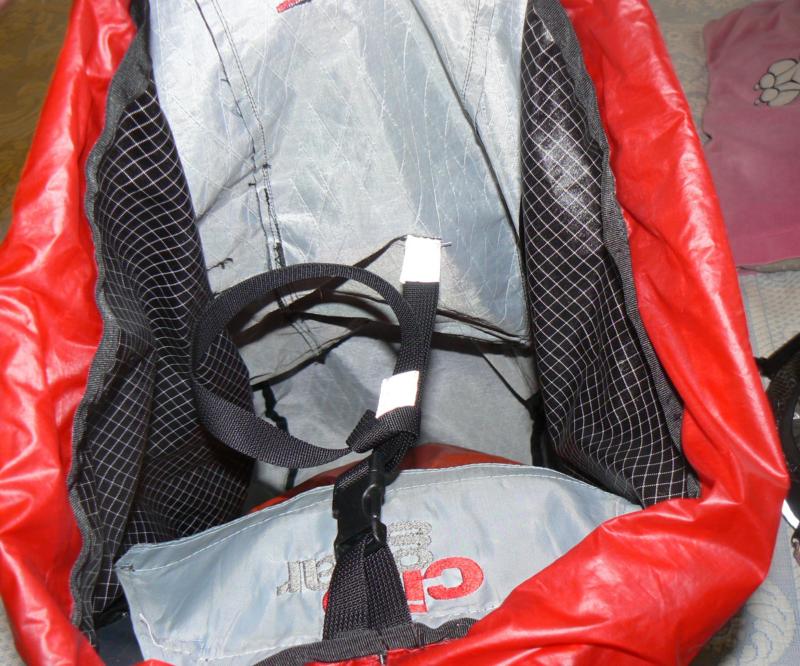
The foam and framesheet go inside a pocket inside the pack. The top of the frame pocket has a flap that folds over and velcros to secure the frame. On the v3 and v4 packs, the flap contains a pocket, but on this pack, it is just a flap. Another feature of this pack is an internal compression strap which is visible in the second picture. The end sewn to the pack has some reflective fabric on it, as well as the other end of the strap, which I tied to the middle of the strap to make it easier to photograph. There is a plastic side release buckle for the compression strap. I plan on sewing a thin piece of nylon tape under the pocket to help secure a hydration bladder.
The pack is constructed with a wide variety of fabrics:
The pack comes with very little sewn onto it. There are many dee-clips, which are made out of steel and sliplocks (double D rings), which are made out of acetal, sewn onto the pack with webbing. You can attach a wide variety of straps on the pack to these dee-clips and sliplocks. You can compress the pack without the use of straps by mating the one or more pairs of the appropriate dee-clip and sliplock on the sides of the pack. I find that quite elegant. You can remove the lid as well as the hip belt. You can remove the foam padding as well as the framesheet (though it is unlikely I ever would). There are many places to strap things onto the pack, such as the six lash points on the top of the lid, and the gear loop attachment points on the hipbelt. You can use the extension skirt, and carry really bulky items, or use the pack as an emergency bivy and stick the lower half of your body inside of it.
One small detail I appreciate is that most of the straps are 0.75 inches wide. This is wide enough to not get twisted up, and plenty strong for virtually any use. My WildThings IceSac uses mostly heavy 1 inch webbing, which is overkill in my opinion.
I would really appreciate a hydration bladder pocket. One can slide one into the framesheet pocket, but I would like a way to secure it so it doesn't slide down). I will likely find some way to add one to the pack. There are no external water bottle holders, but CiloGear does sell them as accessories. I wonder how durable the acetal hardware sewn to the pack will be. I suspect it will last longer than the fabric, so it shouldn't be an issue. The extension skirt is made of very thin material. No doubt why it was made with thicker material in v3 and v4 packs. It would be nice to have an interior pocket, but that was also added in the v3 and v4 packs.
If you have comments or suggestions, Email me at turbo-www@weasel.com
Created with gnu emacs and template-toolkit, not some sissy HTML editor.
No Java or javascript needed to view my web pages. They
both have significant security issues.